
Most beginner videography advice starts with gear lists. This guide starts one step earlier: with how to think about gear, settings, and shots so that every decision you make has a reason behind it. Understanding the “why” is what separates footage that looks accidental from footage that looks intentional — and it matters far more than the brand on your camera body.
Whether you’re shooting your first corporate video, building a content portfolio, or just trying to make sense of your new mirrorless camera, this breakdown covers the essentials without the noise.
The Right Gear Mindset for Beginners
The single most counterproductive thing a new videographer can do is spend weeks researching camera bodies before picking up anything and pressing record. Your first camera is a learning instrument, not a career statement.
Your Core Starting Kit
You don’t need an elaborate setup to produce strong work. The priority order for spending matters more than the specific models:
- Camera body: A modern mirrorless or DSLR that shoots 4K. Both Sony’s entry-level APS-C lineup and Canon’s EOS M and R series offer capable 4K video at accessible prices. What matters most is that it lets you shoot in manual mode.
- A fast prime lens: A 35mm or 50mm lens with a wide maximum aperture (f/1.8 or f/2) gives you beautiful subject separation and performs well in low light — two problems beginners hit constantly.
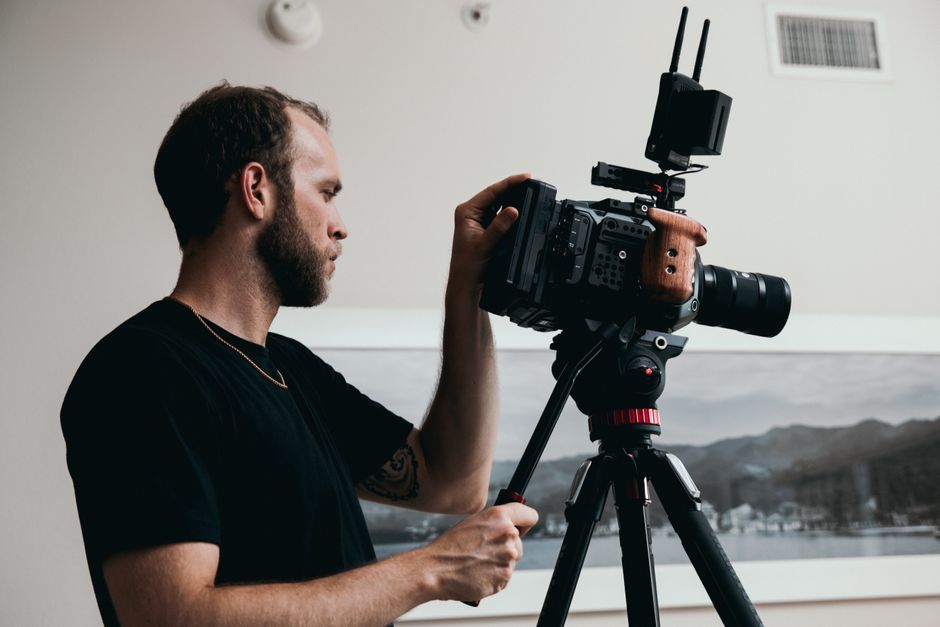
- A tripod: Stability is non-negotiable. Even a mid-range fluid-head tripod will immediately elevate the professionalism of your footage. Handheld is a stylistic choice; shaky footage from negligence is not.
- An external microphone: Built-in camera mics are a last resort. A compact shotgun mic mounted to your hot shoe, or a clip-on lavalier for interviews, makes an immediate and dramatic difference in perceived quality.
- Lighting (at least one source): A single bi-color LED panel gives you controllable, consistent light that no amount of post-processing can fully replicate after the fact.
Notice that audio and lighting appear before any talk of accessories or upgrades. That priority is intentional — viewers forgive average visuals far more readily than they forgive bad sound or flat, muddy light.
Camera Settings: The Four You Must Understand
Manual mode feels overwhelming until you realize that video camera settings are governed by a small set of interrelated decisions. Master these four and the rest falls into place.
1. Frame Rate
Frame rate determines how motion looks and feels. For most cinematic or corporate work, 24fps is the standard — it’s the frame rate of film and carries an inherently cinematic quality. For live events, web content, or anything that benefits from a crisper, more “real” feel, 30fps is the reliable default. Shooting at 60fps or higher gives you slow-motion capability in post, which is useful for product detail shots or action sequences.
Choose your frame rate first. Every other setting flows from it.
2. Shutter Speed (The 180-Degree Rule)
This is where beginners most often go wrong. For natural-looking motion blur, your shutter speed should be double your frame rate — a principle known as the 180-degree shutter rule. Shooting at 24fps? Set your shutter to 1/50. Shooting at 30fps? Use 1/60. Shooting at 60fps? Lock to 1/120.
Shutter speed that is too high creates an unnaturally “crisp,” strobe-like motion. Too slow produces excessive blur. Neutral density (ND) filters are how professionals maintain the correct shutter speed outdoors in bright conditions without blowing out exposure — they’re a small investment with a large payoff.
3. Aperture
Aperture controls two things simultaneously: how much light enters the lens and how much of the frame is in sharp focus (depth of field). A wide aperture like f/1.8 or f/2.8 creates a shallow depth of field — the soft, blurred background look that defines modern cinematic video. A narrow aperture like f/8 or f/11 keeps more of the frame in focus, useful for landscapes or wide environmental shots.
For interview and talking-head work, f/2.8 to f/4 is a reliable sweet spot — cinematic separation without the focus-hunting that comes with extremely wide apertures.
4. ISO
ISO controls how sensitive your camera sensor is to light. The practical rule: keep it as low as possible. Higher ISO values introduce digital noise (grain) that is difficult to remove in post without degrading image quality. Start at your camera’s base ISO (often ISO 100 or 200) and raise it only after you’ve opened the aperture and adjusted lighting as far as they’ll go.
One More: White Balance
Set white balance manually. Auto white balance drifts between shots and between takes, creating inconsistencies that are tedious to fix in editing. Match your Kelvin value to your dominant light source — roughly 3200K for tungsten/warm LED, 5600K for daylight, and 4000K–4500K for mixed indoor environments. If you’re shooting log or RAW, consistency in-camera still matters because it informs your color grade.
The Shots Every Beginner Must Build Into Their Toolkit
Knowing how to operate a camera is only half the skill. Knowing which shots to get — and why — is what makes an edit feel complete. Good video production is always planned around a shot hierarchy, not assembled from whatever was captured.
Wide / Establishing Shot
The wide shot orients the viewer. It answers: where are we, and how big is this space? Every sequence should open with one. It doesn’t have to be the first shot in your edit, but you need it in your library. Pull back far enough that the subject is clearly placed within their environment.
Medium Shot
The workhorse of video production. Framing a person from roughly the waist up, the medium shot balances context and intimacy. For interviews and testimonials, this is often your primary camera position. It’s close enough to read facial expression without feeling invasive.
Close-Up and Extreme Close-Up
Close-ups communicate emotion and detail. A face filling the frame during a key statement, a hand turning a dial, a logo on a product — these shots add texture and rhythm to any edit. Beginners consistently under-use them. Train yourself to think: what detail would make this moment land harder? Then get tight on it.
Cutaway / Insert Shot
Cutaways are your editorial safety net. They cover jump cuts, give the editor breathing room, and add visual interest. If you’re filming a chef, the cutaway is the close-up of the knife on the board. If you’re covering a business interview, it’s hands on a keyboard or a team in a meeting room. Collect at least three to five relevant cutaways per scene — you will always use them.
Movement Shots: Pan, Tilt, and Push
Camera movement should be motivated — it follows the action or reveals new information, not just fills time. A slow pan across a space establishes geography. A tilt up to a building communicates scale. A slow push-in on a subject adds intensity or emphasis. Start movements locked and finish locked; floating starts and stops signal amateur work immediately.
Teams at Tone Production plan camera movement during pre-production, not on set. That intentionality is the difference between a shot list and a wish list.
Putting It Together: The Beginner’s Shot Order on Any Shoot
When you arrive on location with no shot list, default to this order to make sure your edit has everything it needs:
- Wide establishing shot first — always. Lock your exposure here.
- Primary medium coverage — your main action or interview from the key angle.
- Reaction or secondary angles — alternate perspectives that give the editor options.
- Close-up details — products, hands, faces, signage, anything tactile or specific.
- Movement shots last — when exposure is confirmed and you have your static coverage secured.
This order ensures that if you run short on time, you never lose the essential footage. Detail and movement shots are the first to go; wide and medium coverage are non-negotiable.
Common Beginner Mistakes (and Quick Fixes)
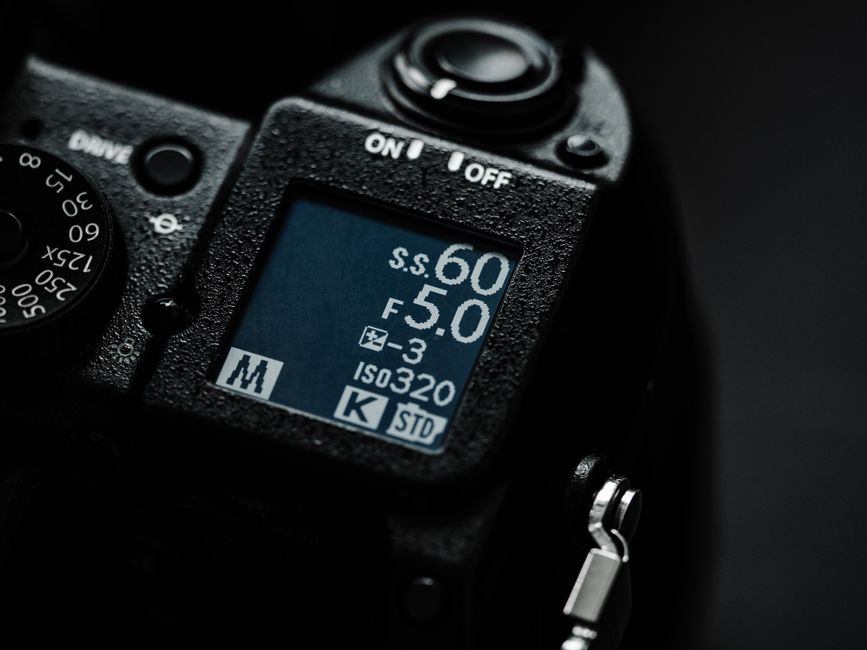
- Leaving shutter speed on Auto: The camera will not apply the 180-degree rule. Set it manually every time.
- Ignoring background clutter: Look at the full frame before you record, not just the subject. Move objects, close doors, reposition talent.
- Zooming instead of moving: Optical zoom during a shot reads as cheap. Move your feet or change focal length between shots.
- Skipping the external mic: Camera audio is good enough for a reference track, not a final deliverable.
- Under-collecting cutaways: You cannot go back. Shoot three times more B-roll than you think you need.
Whether you’re producing content for a business in Houston, Atlanta, or Tampa, these fundamentals are universal. The location changes; the shot hierarchy doesn’t.
When to Stop Practicing and Start Producing
There is no perfect moment of readiness. The gap between beginner footage and professional footage closes faster on set — under real pressure, with real subjects — than it ever does in controlled practice. Set yourself a simple standard for your first five shoots: nail your settings before pressing record, get the wide shot first, and collect at least five cutaways per scene.
From those five shoots, you’ll identify your actual weaknesses. That’s when targeted practice pays off. Skill in videography is built by doing, reviewing, and adjusting — not by reading gear reviews.
If you’re ready to produce work that goes beyond the learning curve, the team at Tone Production — led personally by Benjamin Tone — is available to handle the full production workflow for you.
Frequently Asked Questions
What camera settings should a beginner use for video?
Start by setting your frame rate (24fps for cinematic, 30fps for web/events), then apply the 180-degree rule: shutter speed = 2x your frame rate. Set aperture based on your desired depth of field (f/2.8–f/4 for interviews), keep ISO as low as possible to avoid noise, and set white balance manually to match your lighting source.
Do I need expensive gear to start videography?
No. A modern mirrorless or DSLR camera body with a fast prime lens (50mm f/1.8), a basic fluid-head tripod, an external microphone, and one LED light panel are enough to produce professional-quality results. Investing in audio and lighting before camera upgrades will give you the biggest quality jump.
What is the 180-degree shutter rule in video?
It’s the guideline that your shutter speed should be double your frame rate. For 24fps, use 1/50 second; for 30fps, use 1/60 second; for 60fps, use 1/120 second. This produces natural-looking motion blur that matches how the human eye perceives movement.
What shot types should every beginner know?
The five essentials are: wide/establishing shot, medium shot, close-up, cutaway/insert shot, and motivated camera movements (pan, tilt, push). Collect all five on every shoot and your editor — whether that’s you or someone else — will have everything needed to build a complete, professional sequence.
How important is audio for beginner videography?
Critically important. Viewers tolerate average visuals far more readily than poor audio. An external shotgun microphone or clip-on lavalier mic should be one of your first gear purchases — before any camera upgrade. Never rely on a built-in camera microphone for a deliverable project.
What is a cutaway shot and why does it matter?
A cutaway (also called a B-roll or insert shot) is footage of something other than the main subject — hands at work, a product detail, an environmental moment. Cutaways allow editors to cover jump cuts, control pacing, and add visual interest. Collecting at least five cutaways per scene is a professional habit every beginner should develop immediately.
Should I shoot in 4K or 1080p as a beginner?
4K is the better default if your camera and storage support it. It gives you more flexibility to crop and reframe in post, and future-proofs your footage. However, 1080p is entirely sufficient for social media and web delivery, and produces smaller file sizes that are easier to manage while you’re building your workflow.
What is the best frame rate for video beginners?
24fps for anything that should look cinematic or polished. 30fps for corporate, web, and social content. Shoot at 60fps or 120fps only when you need slow-motion in post. Pick one frame rate before the shoot and set your shutter speed accordingly — don’t switch between them mid-shoot unless intentional.