
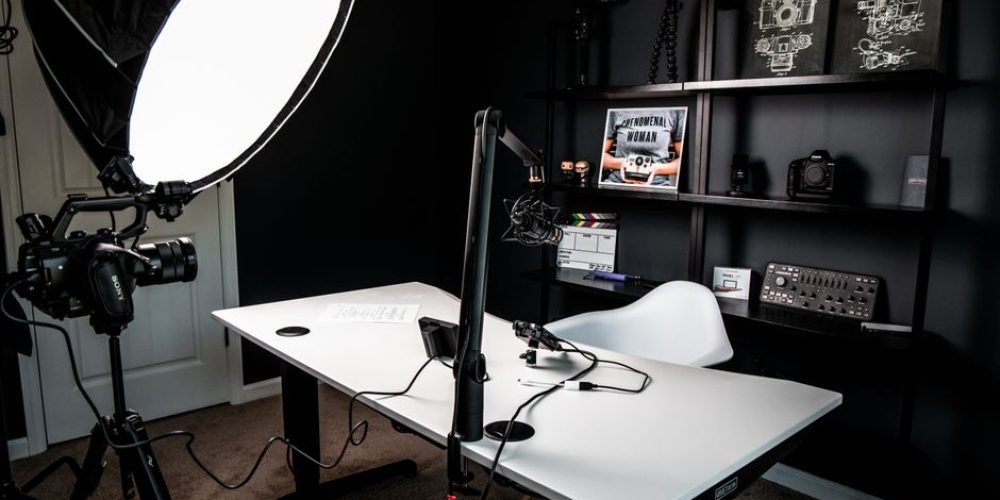
Most product videos are not shot in expensive studios. They are shot in clean corners of offices, conference rooms, and break areas by people who understand that strategy and setup beat gear and square footage every time. If you have a decent camera or smartphone, a wall, and thirty minutes to prep, you have everything you need to start. This guide covers the practical, repeatable process for filming a product video on a budget inside your own office—from pre-production through the final export.
Why the Office Is Actually a Great Filming Location
Conventional wisdom says you need a studio to produce anything worth watching. Conventional wisdom is wrong. Professional production companies routinely use the same fundamentals—strong light, clean framing, controlled audio—whether they are on a $50,000 commercial set or inside a client’s conference room. What kills in-office footage is not the space itself; it is clutter, bad light, and echo. All three are solvable without spending much money.
The office also carries a practical advantage: you already pay for it. There are no location fees, no permits, no travel time, and no logistical headaches. A controlled indoor space gives you consistent lighting windows and the freedom to reshoot a single angle without coordinating an entirely new day.
Step 1 — Pre-Production: Script, Shot List, and Storyboard
The single biggest cost-saver in any production is a clear plan before cameras roll. Every extra unplanned minute of filming means more footage to sort through and more time spent in editing. Keep it tight.
Define Your One Goal
Before writing a word, answer this: what is the single action you want a viewer to take after watching? Click to buy, book a demo, share the video—pick one. Every other decision flows from that answer. A product video that tries to do everything typically achieves nothing.
Write a Lean Script
A focused script eliminates reshoots and keeps editing efficient. Aim for 60–90 seconds of finished video, which translates to roughly 150–225 spoken words. Use bullet points to outline each scene and keep dialogue purposeful—every spoken line should either demonstrate a feature, solve a viewer problem, or reinforce trust.
Build a Simple Shot List
List every angle you need: a hero wide shot of the product, a close-up of key features, a “hands using the product” shot, and a label or logo reveal. Group shots by setup so you can capture all angles from one camera position before moving the lights. This alone cuts your shoot time in half.
Step 2 — Setting Up Your In-Office Space
Choose the Right Corner
Walk your office and look for a wall with minimal visual noise. A plain-painted wall, a bookshelf with consistent props, or an empty conference room wall all work. Avoid walls with windows directly behind the subject—that back-lighting blows out your exposure. Shoot parallel to a window, not facing it or with your back to it.
Clean and Control the Background
Clear all clutter from the frame. The goal is for the viewer’s eye to land on the product and stay there. If the existing wall is distracting, a roll of seamless paper backdrop (available for under $40) or a clean fabric hung with binder clips creates an instant professional look. For tabletop product shots, a sheet of white foam board or a piece of acrylic serves as an inexpensive sweep that eliminates shadows beneath the product.
Acoustic Treatment
Hard office surfaces—tile floors, glass walls, bare drywall—create reverb that makes audio sound hollow and amateur. Before rolling, place couch cushions, moving blankets, or even a rolled rug near the recording position. Soft furnishings absorb reflections and dramatically improve voice clarity without any dedicated acoustic panels.
Step 3 — Lighting on a Budget
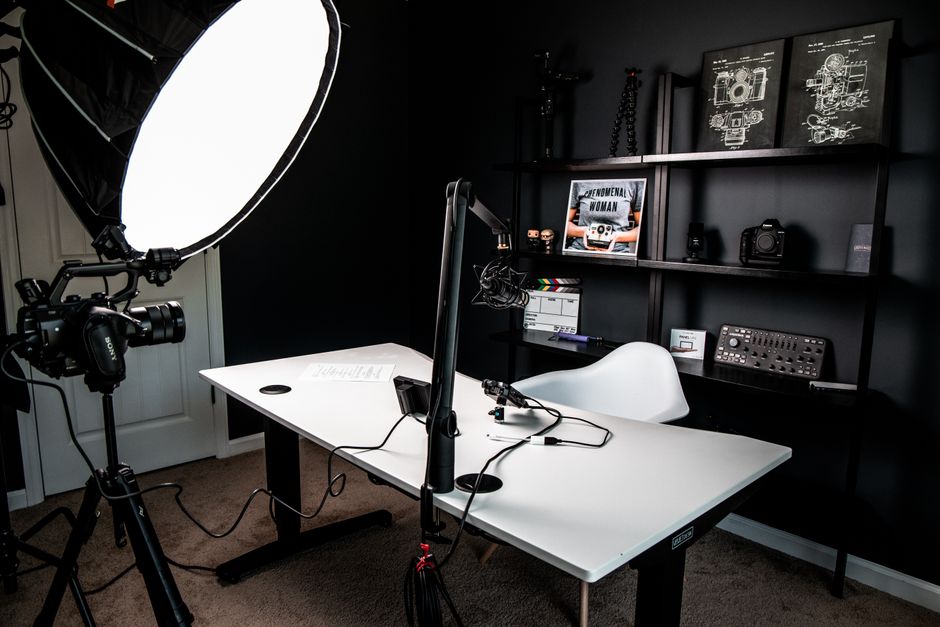
Lighting is the single highest-leverage variable in image quality. A mediocre camera with excellent light beats an expensive camera with poor light every time.
Window Light as Your Key
Natural light from a north- or east-facing window is soft, flattering, and free. Position your product or subject so the window light falls at roughly 45 degrees to the front face of the product. If the light is too harsh or creates hot spots, tape a single layer of white paper or a sheer curtain over the window to diffuse it.
When You Need Artificial Light
If your office has no usable windows or you need to film after business hours, an affordable LED panel or a two-light softbox kit is the practical solution. Entry-level LED bi-color panels capable of producing clean, color-accurate light are widely available. A simple two-light setup—one key light at 45 degrees, one fill or reflector card on the opposite side—handles the vast majority of tabletop and talking-head product shots cleanly.
Tabletop Product Shots: The Overhead Rig
For small products filmed flat, an overhead light mounted to a C-stand or a DIY ceiling-mount creates an elegant, shadowless look. Position a large soft source overhead, add a black card behind the product to keep light from spilling into the background, and you have a setup that rivals commercial product photography studios at a fraction of the cost.
Step 4 — Camera and Stabilization
What Camera to Use
Modern flagship smartphones shoot 4K with optical image stabilization and perform well in moderate light—they are a legitimate production tool for in-office product work. If you have access to an entry-level mirrorless or DSLR, use it; the larger sensor helps in lower light and gives you more control over depth of field. Either way, the camera matters less than how it is used.
Lock It Down
Shaky footage is one of the fastest ways to undermine perceived production value, and it is nearly impossible to fix in post. A tripod—even a $30 entry-level model—locks your framing, keeps angles consistent between takes, and frees you to focus on directing the product or talent rather than fighting camera wobble. For close product moves, a simple slider or even setting the camera on a smooth surface and gently pushing it creates cinematic tracking motion.
Shoot at Higher Frame Rates
Shooting b-roll of your product at 60fps or 120fps and slowing it to 24fps in editing adds a polished, cinematic quality to reveals and detail shots. This technique costs nothing extra and consistently elevates the perceived value of the finished video.
Step 5 — Audio for Product Videos
If your product video includes narration or a spokesperson, audio quality determines whether viewers stay or leave. Built-in camera or phone microphones pick up room noise, HVAC hum, and echo. An external microphone is not optional—it is the minimum viable investment for usable sound.
- Lavalier mic: Clips to the subject’s lapel and isolates their voice cleanly. Wired lavs start at around $20–$30 and produce surprisingly good results for talking-head product demos.
- USB condenser mic: Ideal for voiceover narration recorded at a desk after the shoot. Clean, directional, and easy to set up.
- Shotgun mic: Mounts on-camera and focuses forward, reducing ambient noise. Good for run-and-gun office footage where a lav is impractical.
Record a 30-second test before every setup. Listen back with headphones. If you hear echo, add more soft material to the room. If you hear HVAC noise, turn it off during takes if possible, or reposition away from the vent.
Step 6 — Filming the Product Itself
Show the Product Doing Its Job
Feature lists belong in spec sheets. Product videos perform best when they show a real-world scenario: hands using the product, a problem being solved, or an outcome being achieved. Think of it as showing the viewer what life looks like after they own this thing.
Capture More Than You Think You Need
Always shoot multiple takes of every angle. Film wide before going tight—it is easy to crop in during editing, but you cannot add back what was outside the frame. Keep the camera rolling even between formal takes; some of the most usable product b-roll is caught in transitional moments.
Clean the Product Before Every Setup
Fingerprints, dust, and smudges that are invisible to the naked eye become glaring under video lights. Wipe down the product with a microfiber cloth before each new angle. This one habit saves significant time in post-production retouching.
Step 7 — Post-Production Without Breaking the Budget
Free and low-cost editing tools available today are powerful enough for professional product video work. DaVinci Resolve (free) provides industry-grade color grading, audio tools, and a full editing timeline. CapCut handles social-optimized cuts with built-in captions and auto-subtitles. iMovie (free on Mac/iOS) is a clean, fast option for straightforward cuts. Focus on clean edits, readable lower-third text, and consistent color—viewers respond to clarity, not complexity.
Once your master edit is locked, plan how it will be repurposed. A single 90-second product video can be trimmed into a 15-second social teaser, a square-format Instagram cut, and a vertical 9:16 clip for TikTok and Reels—all from one shoot. That kind of asset multiplication is how small teams stretch a limited production budget across multiple platforms without scheduling additional shoot days. Teams producing regular product content for brands like those in fast-moving markets use this batch approach to stay consistent without burning budget.
The Non-Negotiable Quality Checklist
- Background is clean and distraction-free
- Key light is soft and positioned at 45 degrees
- Camera is locked on a tripod for every primary shot
- External microphone is used for any spoken audio
- Product is clean and free of fingerprints
- Multiple takes captured for every angle
- 60fps b-roll recorded for slow-motion reveals
- Edit is reviewed with headphones for audio issues
High-quality product videos come from disciplined preparation and smart technique, not expensive equipment. Working with structured pre-production and a clear shot list, even a one-person crew using a smartphone can produce content that converts. Start with this framework, refine your setup with each shoot, and your in-office product videos will get measurably better every time.
If the production stakes are high enough that DIY isn’t the right answer—a product launch, a major pitch, a campaign that has to perform—Tone Production and Benjamin Tone are available to handle the entire process, from concept through final deliverables, with the same care and personal attention applied to every engagement.
Frequently Asked Questions
What camera do I need to film a product video in my office on a budget?
A modern flagship smartphone shooting 4K is a legitimate starting point for in-office product video. Features like optical image stabilization and manual exposure control make them practical production tools. If you have access to an entry-level mirrorless or DSLR camera, the larger sensor gives you more depth-of-field control and better low-light performance—but the camera is rarely the limiting factor. Lighting, stabilization, and audio almost always matter more.
How do I light a product video without buying expensive studio equipment?
A window with soft, indirect natural light is your best free option. Position the product or subject at a 45-degree angle to the window and diffuse harsh direct sun with a sheer curtain or white paper. For after-hours or windowless offices, an affordable LED bi-color panel paired with a foam-board reflector card handles most product and talking-head setups cleanly without a large investment.
What background should I use for an office product video?
A plain, uncluttered wall works well. If your walls are busy or distracting, a roll of seamless paper backdrop (typically under $40) or a clean piece of fabric hung with clips creates an instant professional background. For tabletop product shots, a sheet of white foam board or a piece of acrylic creates a shadow-free sweep that focuses attention on the product.
Do I need a microphone if my product video has no on-screen spokesperson?
If the video is purely visual with licensed music or no audio, a dedicated microphone isn’t required for the shoot itself. However, if there is any narration, voiceover, or on-screen dialogue—even a brief intro—an external microphone is essential. Built-in camera and phone mics introduce echo, room noise, and HVAC hum that significantly undermine the perceived quality of the video.
How long should a product video be?
For most marketing contexts, 60–90 seconds is the practical target. This is long enough to demonstrate the product’s key benefit and include a clear call to action, but short enough to retain viewer attention. If the video will be used as a social ad, a 15–30 second cut edited from the same footage performs well for paid placements and organic short-form platforms.
Can I shoot multiple product videos in one office session?
Yes—batch shooting is one of the best ways to maximize a limited budget. Plan all products and setups in advance using a detailed shot list, keep your lighting consistent across setups, and group similar angles together to minimize repositioning. A single half-day in-office session with solid pre-production can yield three to five usable product videos, all of which can be repurposed across multiple platforms.
What free software can I use to edit my product video?
DaVinci Resolve is the most capable free option, offering professional-grade color grading, audio editing, and a full non-linear timeline. iMovie (Mac and iOS) is a fast, beginner-friendly choice for simple cuts. CapCut works well for social-optimized edits and includes auto-subtitle generation. All three are free to use and produce export quality suitable for web and social platforms.